
Want to create a subdomain in Bluehost, but don’t know how to create subdomains in Bluehost? Then, this guide has got you covered.
In this quick guide, I will cover the easiest way to create a subdomain in Bluehost with just a few mouse clicks. Additionally, I will also cover how to install a WordPress website on a subdomain in Bluehost.
Let’s get started.
What is a Subdomain?
A subdomain is a subdivision of your main domain and acts separately.
For example, my main website domain name is learnwithkaur.com, but I can create multiple subdomains such as blog.learnwithkaur.com, courses.learnwithkaur.com, or job.learnwithkaur.com, to handle different stuff separately, and this helps to organize content and functionality.
Now you know what a subdomain is, let’s discuss how to create a subdomain in Bluehost.
How to Create Subdomain in Bluehost?
Creating a subdomain in Bluehost is quite easy; you just need to go through a few simple mouse clicks as listed below.
Step 1: Log in to the Bluehost Dashboard.
Firstly, go to Bluehost and log in to your Bluehost account using your login credentials.
Step 2: Create a Subdomain.
Once you’re in the Bluehost dashboard, open the “Domains” dashboard from the left navigation panel and select “Subdomain”, which is the last option in the drop-down menu.
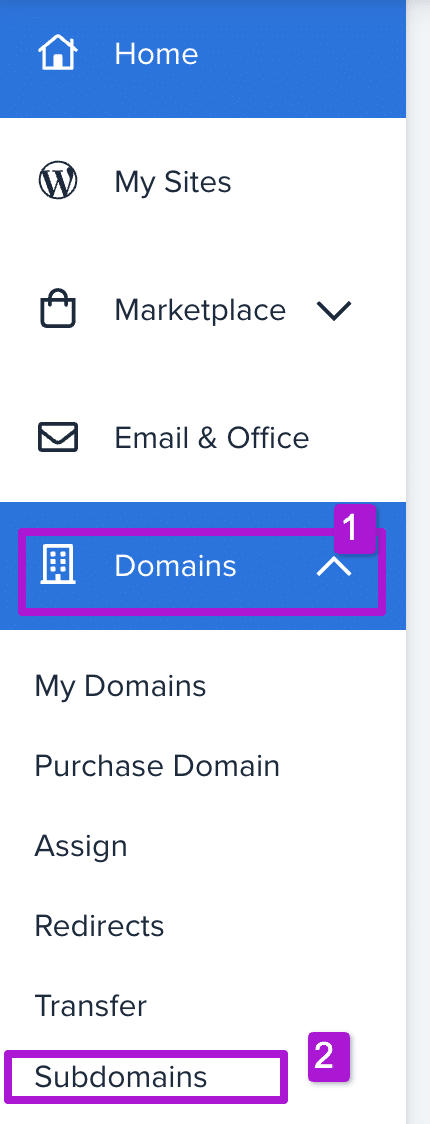
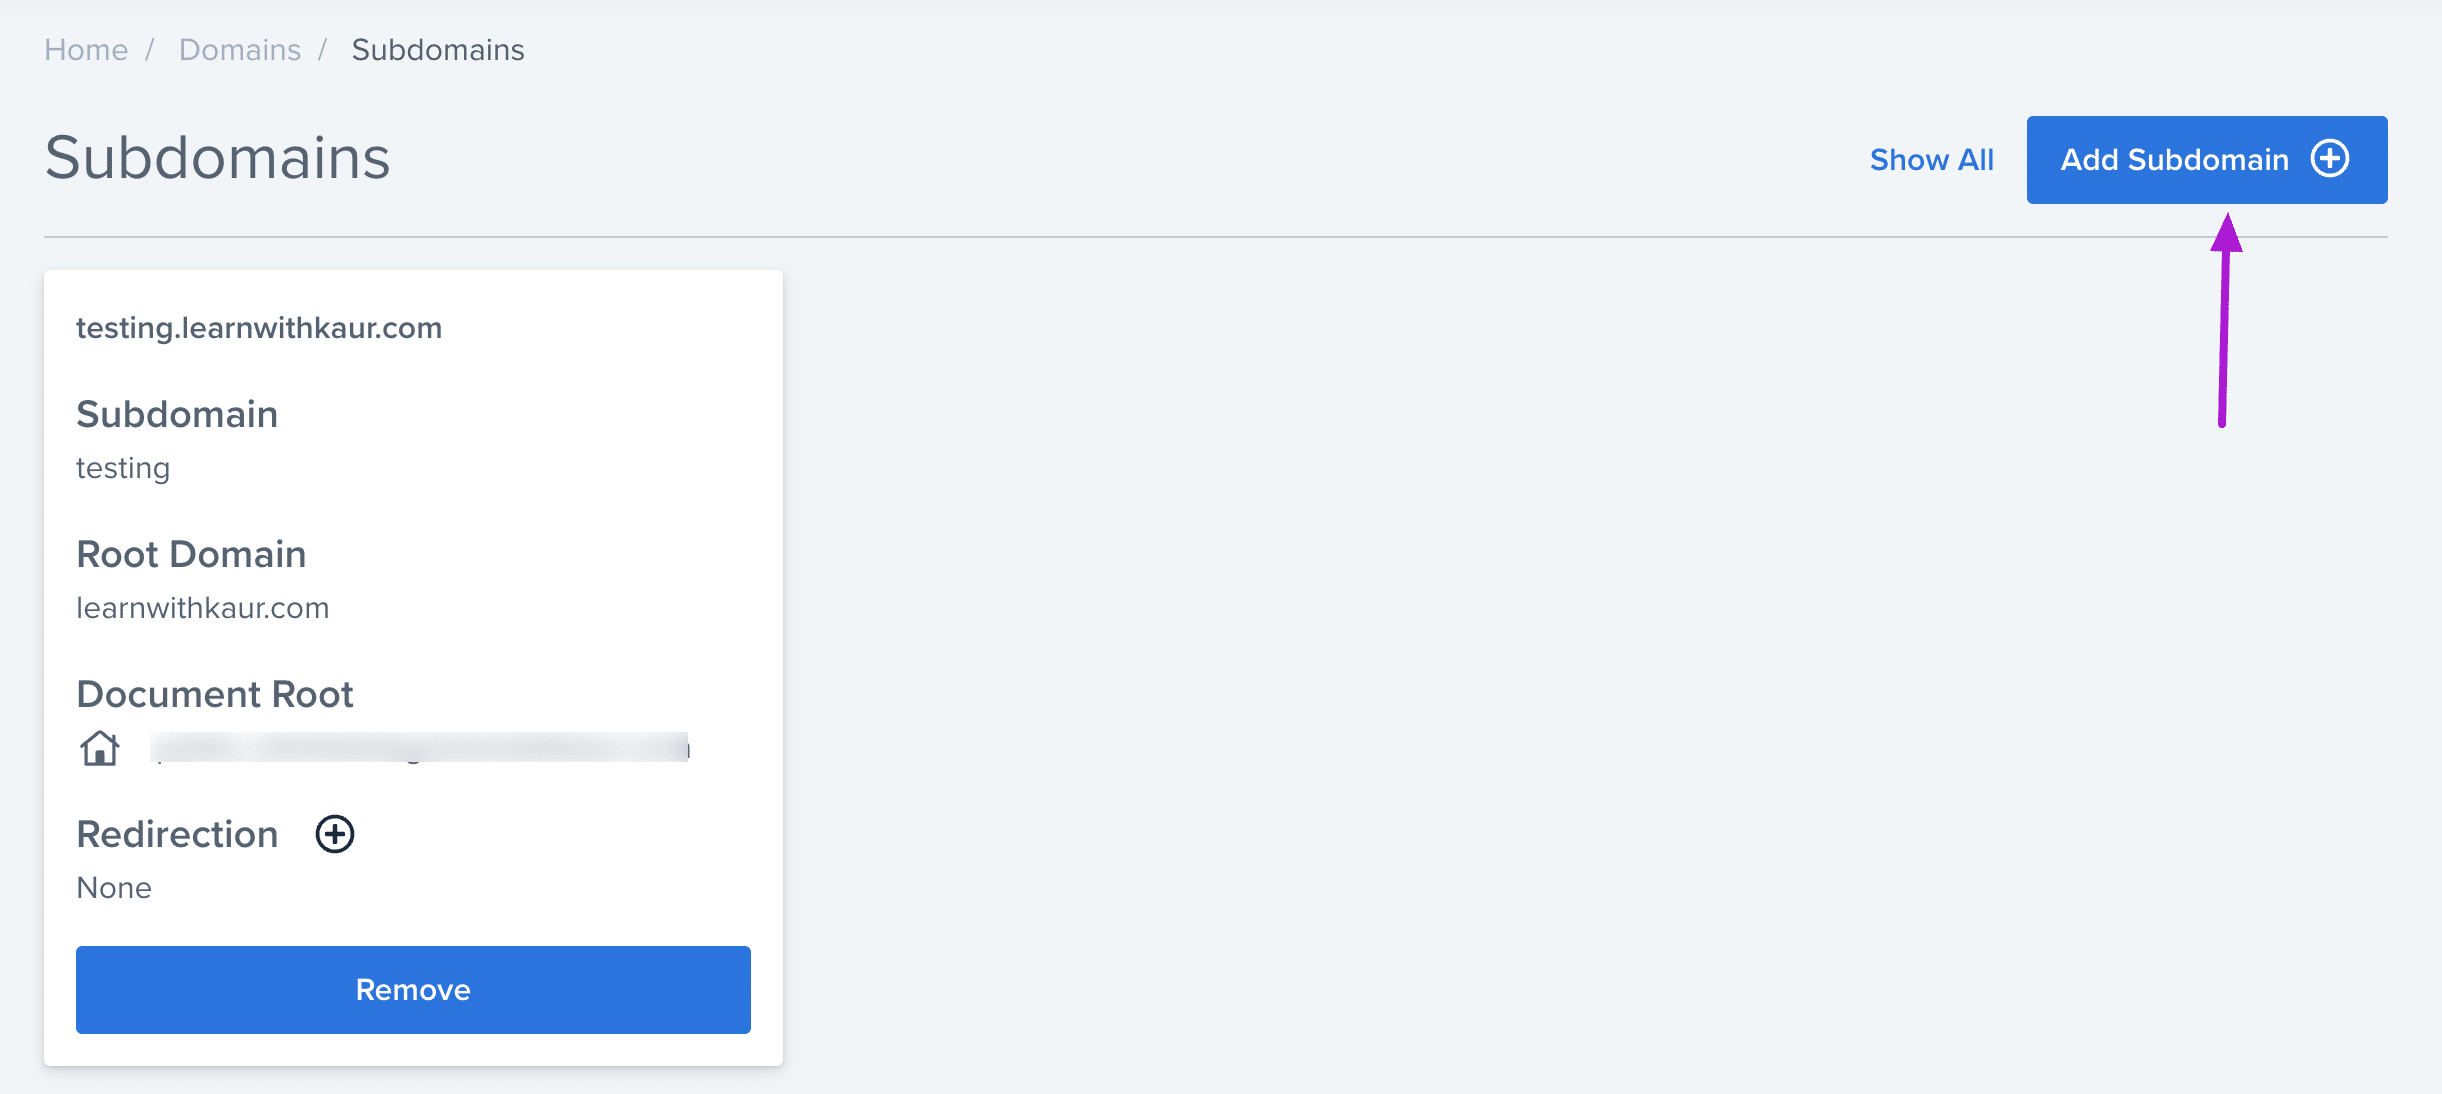
Next, Click on “Add Subdomain.”
Enter your subdomain name in the first box and then choose the domain for which you want to create a subdomain.
For example, I want to create a courses.learnwithkaur.com subdomain for my main website learnwithkaur.com.
So, I will enter courses in the first box, and then I will choose my main domain, learnwithkaur.com, as shown in the screenshot below.
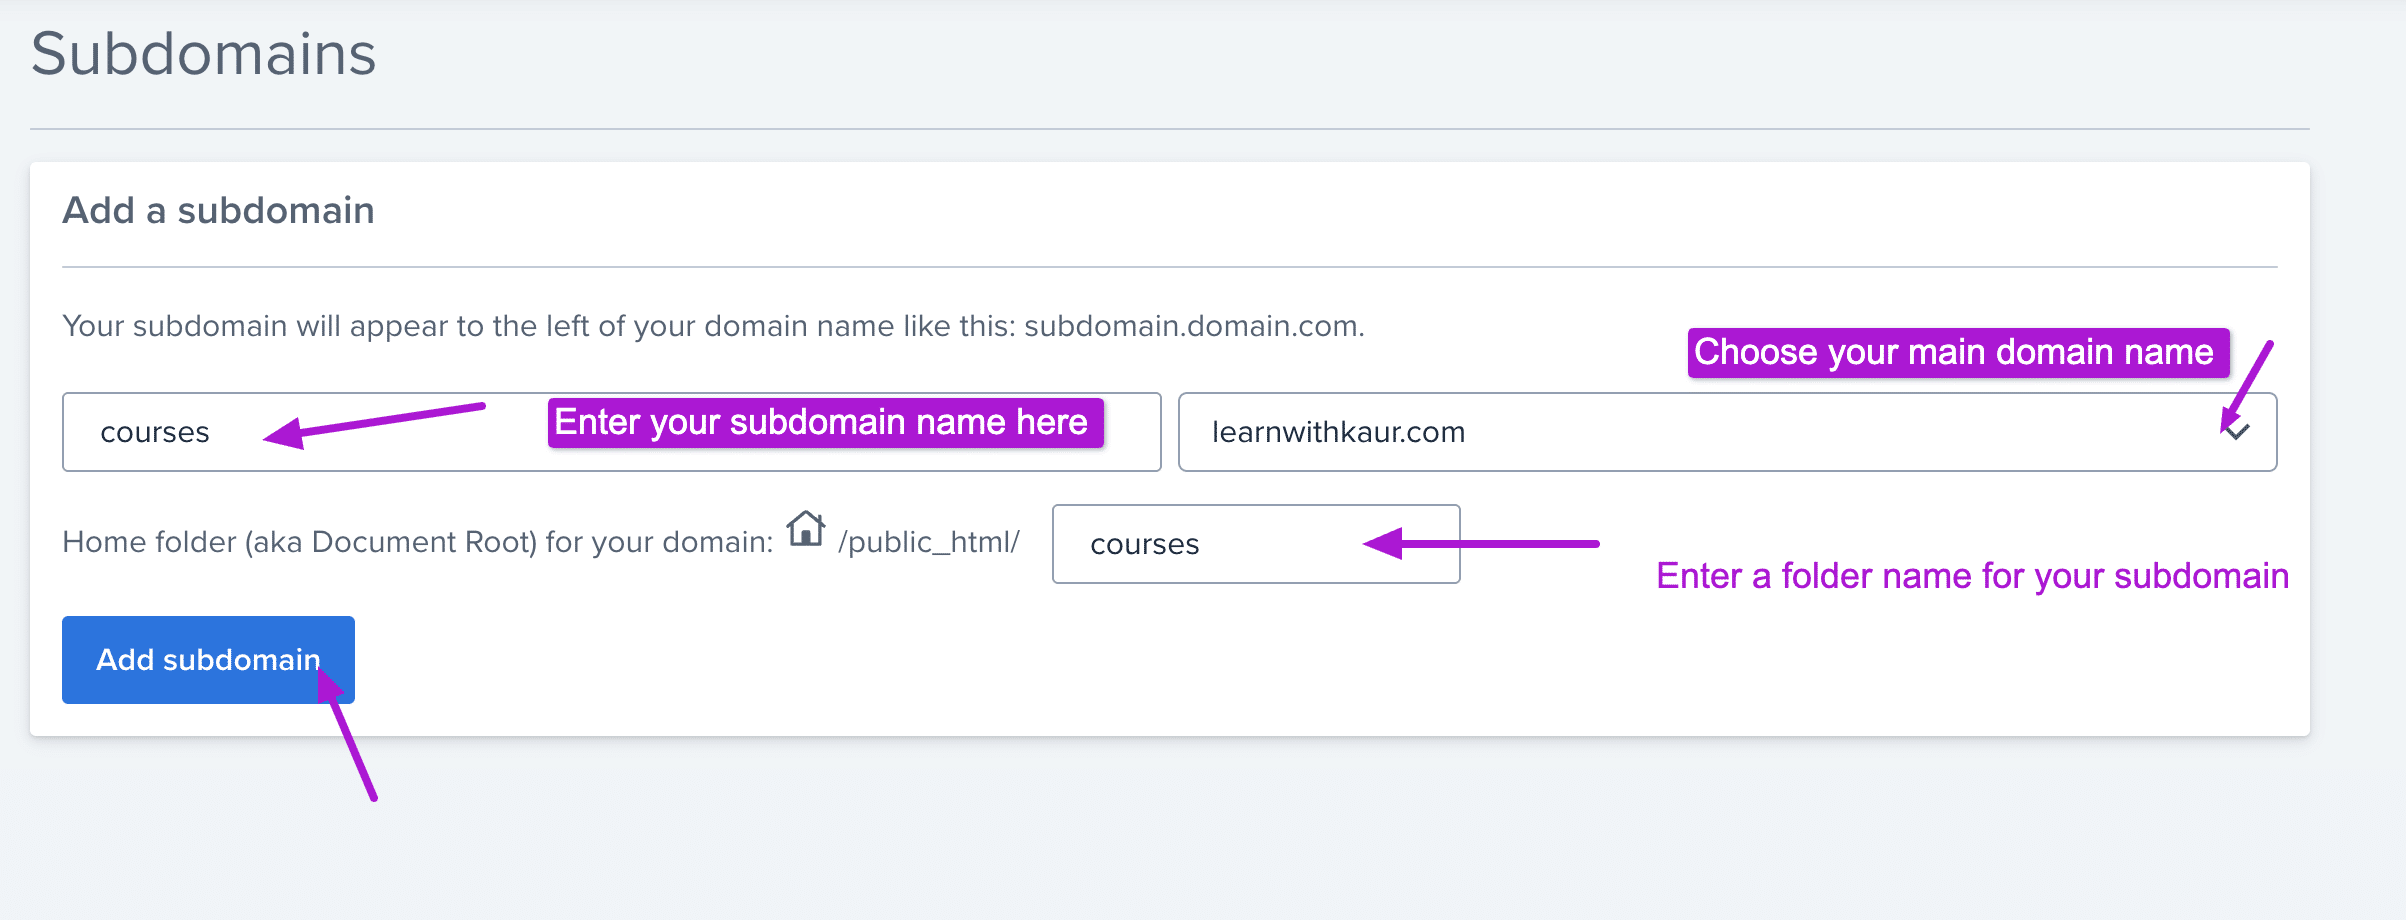
Underneath this, you will see one more option to choose a home folder for your subdomain.
A folder is simply a space in your cPanel where all the data related to your subdomain will be stored.
I will simply enter my subdomain name here to easily remember the folder name, which I can use to easily find my subdomain folder in the C-panel later.
Once done, click “Add Subdomain.”
Once done, your subdomain will be automatically created in the Bluehost dashboard. It may take some time to appear or function properly, so don’t worry about that. In my case, it took a few minutes. So, be patient and wait for some time.
Now you know how to create a subdomain in Bluehost. After this, most probably, you also want to create a WordPress site on this subdomain. So, you can follow the next step to do that.
Step 3: Install WordPress Site on Subdomain
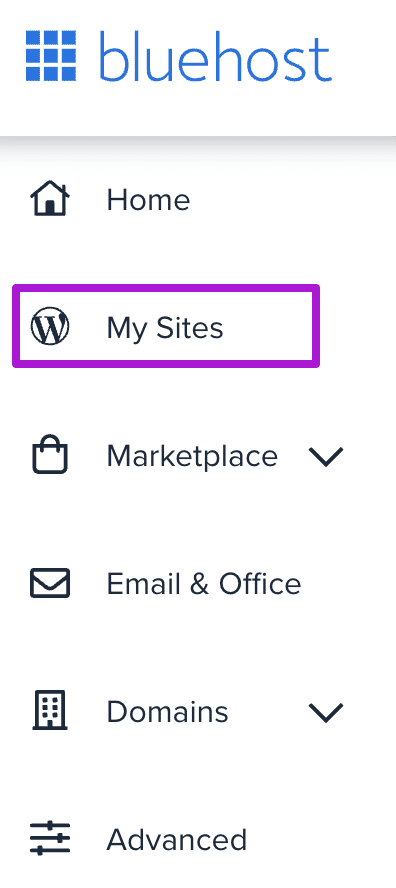
Now, click on “My Sites” from the left navigation.
Choose “Add Site” from the dashboard and click “Add New Site.” If you want to migrate any existing site, you can go with the “Migrate existing site” option.

So, I will just choose the “Create New Site” because in most cases, we want to create a new site on a subdomain.
Give your subdomain site a name and tagline as shown in the screenshot below.

Click on “Advanced” to set WP login credentials and email address. Make sure to copy the credentials and save them in a safe place, which you will need to log in to your subdomain WordPress site admin dashboard. Once done, click “Next.”
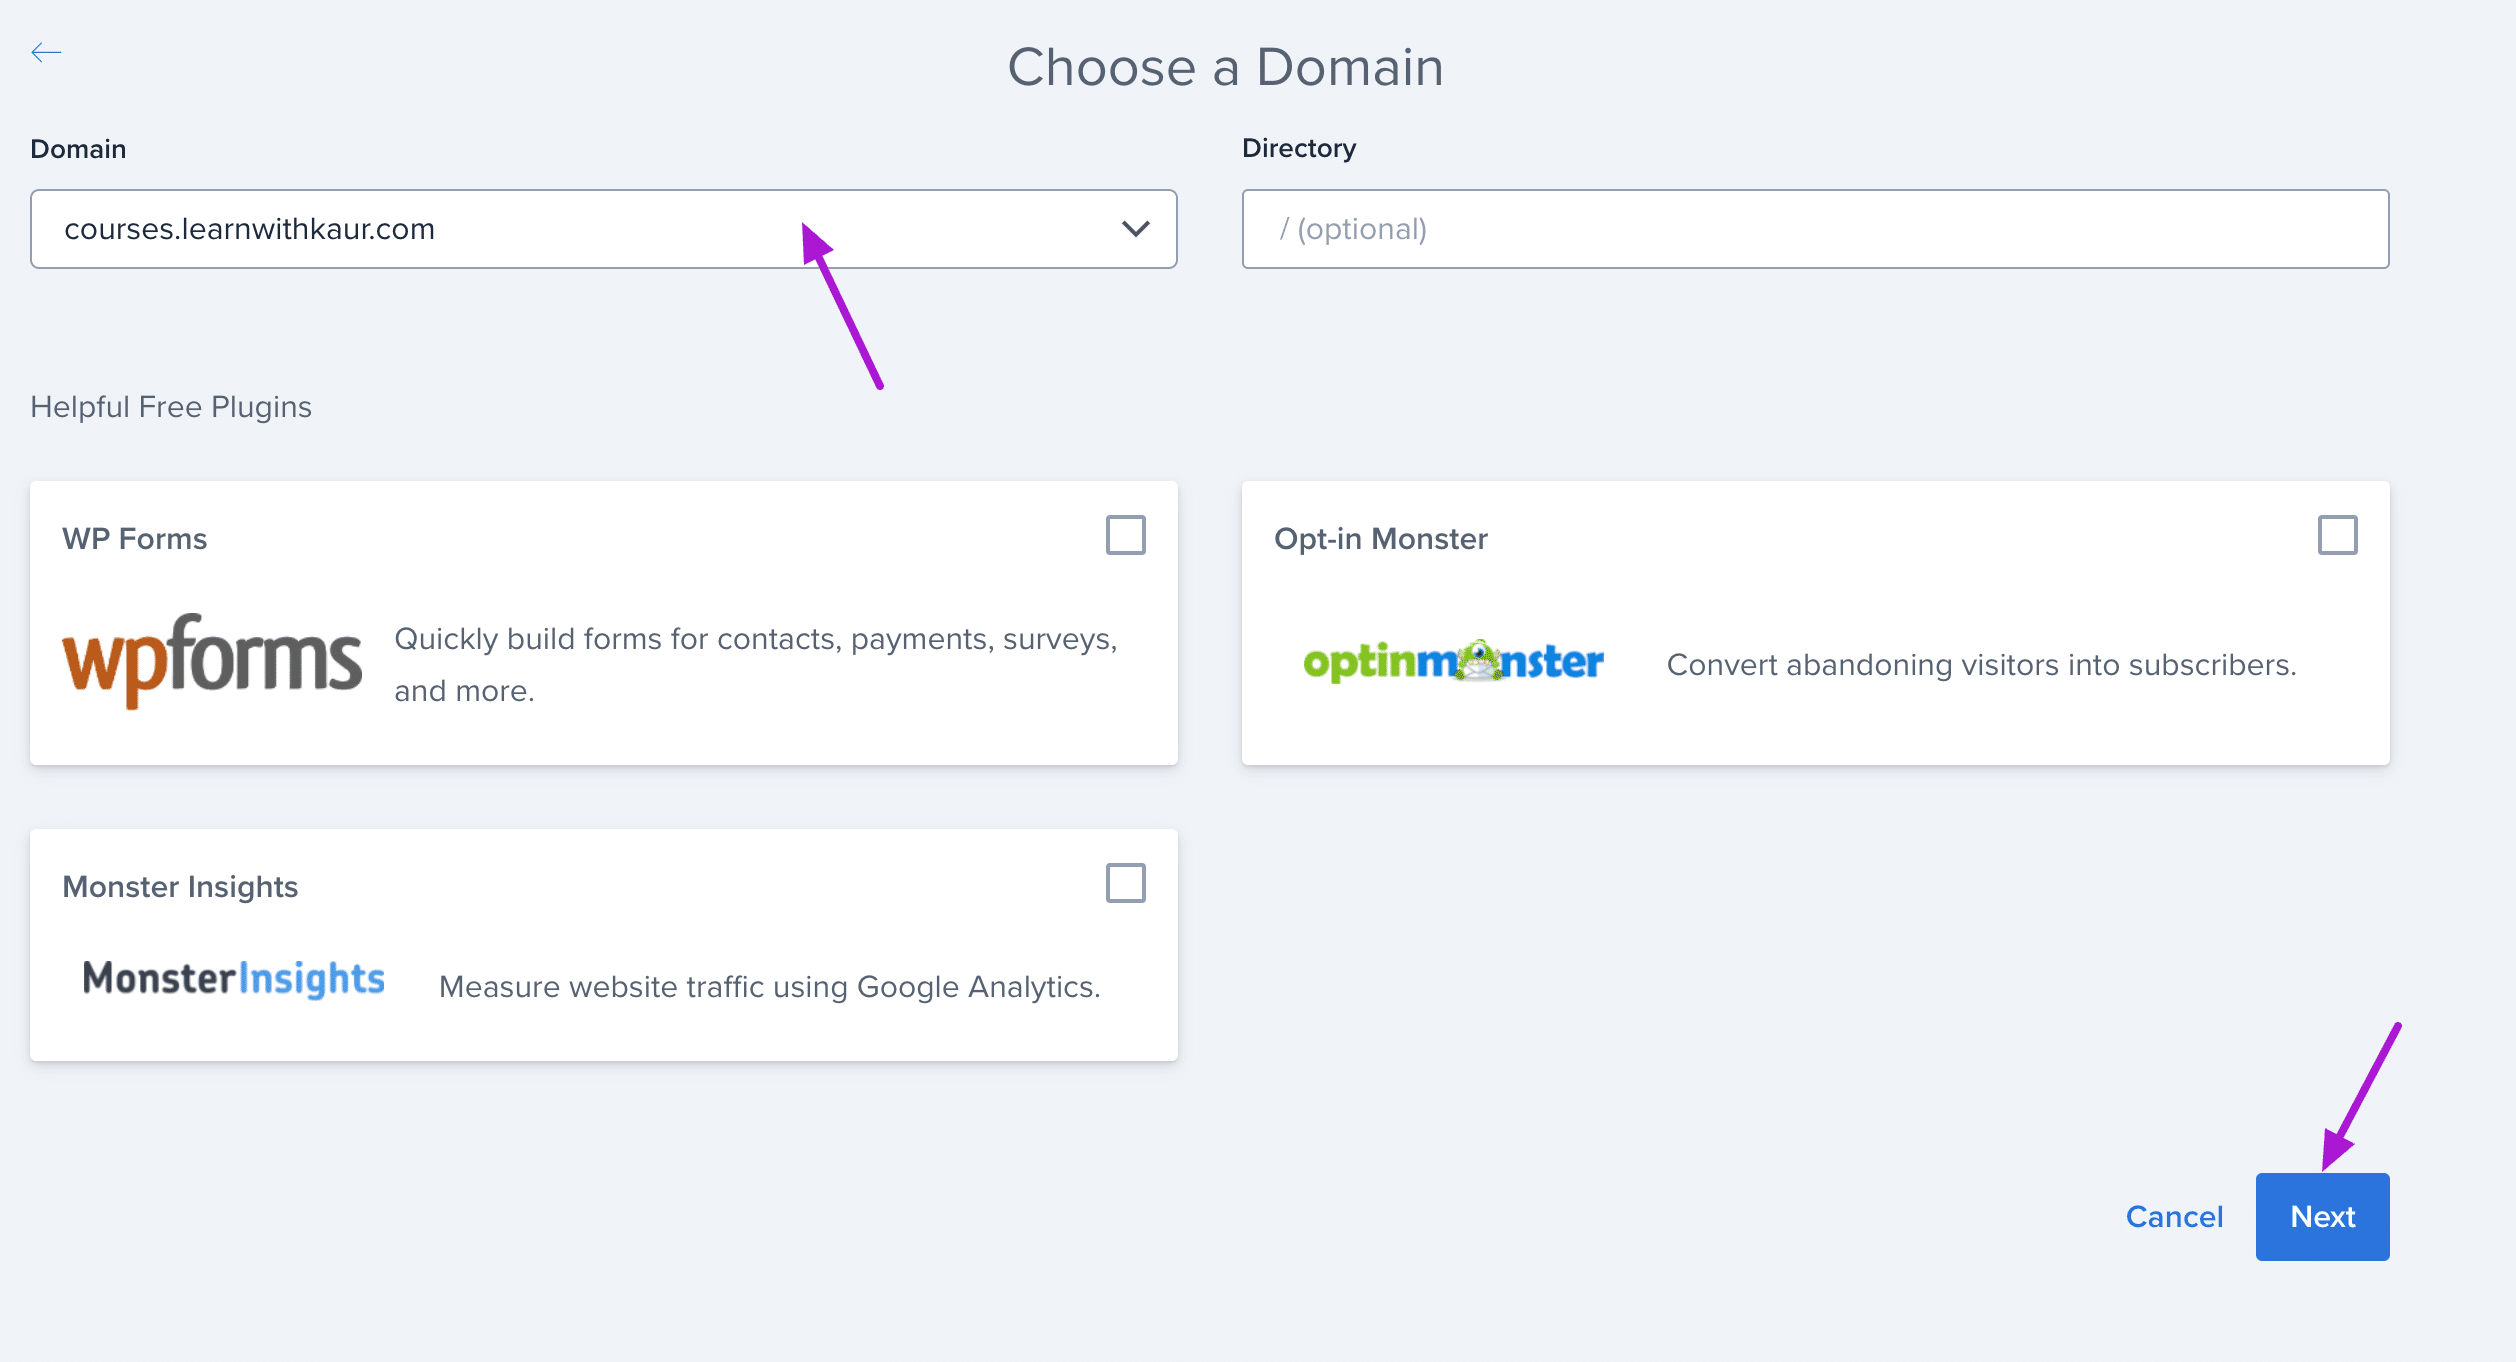
Now choose your subdomain, which is “courses.learnwithkaur.com” in my case. At this step, Bluehost will auto-install some plugins for your subdomain website. In case you don’t need them, you can uncheck the box next to that plugin. Once done, click “Next.”
Now, Bluehost will take care of setting up your WordPress for your subdomain.
Once done, Bluehost will notify you that WordPress is successfully installed for your website, along with the login credentials to access your subdomain WordPress dashboard.

Final Thoughts
This is how you can easily create a subdomain in Bluehost and create a WordPress website on it. I hope this straightforward article will give you clear guidance.
In case you have relevant questions, feel free to leave them in the comments.